
Claude Code CLI is a Claude AI coding assistant that runs in your terminal. It reads your project files, runs commands, edits code and works with git, all from a plain-English conversation. This guide takes you from zero to a working setup: install, log in, and finish a real first project
Claude Code CLI is a Claude AI coding assistant that runs inside your terminal, reading your project files, running commands and editing code from plain-English instructions. If you’re new to the Claude Code command line, this guide walks you through everything step by step: installing it on Mac, Windows or Linux, logging in, and building your first project safely. You’ll also learn the essential commands, permission settings and beginner tips that save time and help you avoid common mistakes. No AI experience needed, just a terminal and about 15 minutes.

1 – Claude Code CLI Explained
Claude Code CLI is Anthropic’s AI coding assistant for the command line. You describe a task in plain English, and it reads your project, edits files, runs commands and works with git, asking your permission before each change.
“CLI” stands for command-line interface: a text window where you type instructions instead of clicking buttons. On a Mac you use Terminal, and on Windows you use PowerShell.
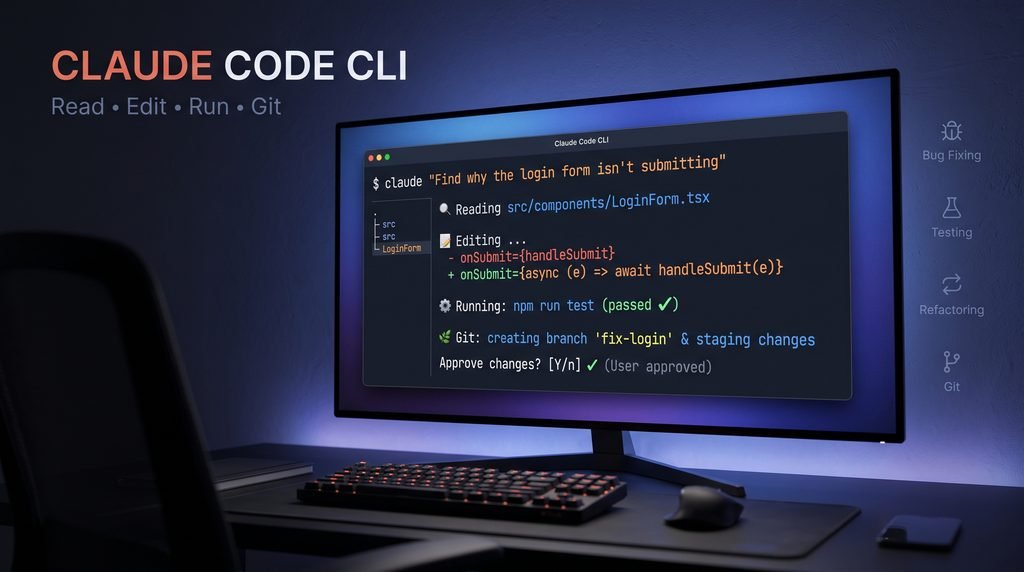
What sets it apart from a normal chatbot is that it acts on your project instead of just talking about it. Type “find out why the login form isn’t submitting,” and it will search your files, read the relevant code, suggest a fix and, with your approval, apply it.
1.1- Common Tasks for Beginners
These are good first tasks, written as prompts you could type:
- Understand code: “Explain how this project is structured and where the main logic lives.”
- Fix bugs: “The submit button does nothing when I click it. Find out why.”
- Write tests: “Write tests for the
calculateTotalfunction.” - Refactor: “This file is 400 lines long. Suggest how to split it up.”
- Handle git: “Look at my changes and write a clear commit message.”
1.2- Claude Code CLI vs Claude.ai Chat
If you’ve used Claude in your browser, you’ve probably copied code into the chat and pasted answers back into your editor. Claude Code removes that loop:
- It works directly on your files, so there’s no copy-pasting.
- It can run commands, such as your test suite, and read the results (with your permission).
- It remembers your project’s context during a session, so you don’t re-explain everything.
1.3- Claude Code CLI vs Other AI Coding Tools
Tools like GitHub Copilot and Cursor mostly live inside your editor and focus on suggestions and inline edits. Claude Code is terminal-native and agentic, meaning it can carry out multi-step tasks: read files, make changes, run tests, then fix what failed. It can also be extended with hooks, skills and MCP servers, which you can learn later. None of these tools is best for everyone, and plenty of developers use more than one.
1.4 – Who Should Use Claude Code CLI
It suits developers, students, freelancers and hobbyists who want help with real projects. If you’d rather avoid the terminal, Claude Code also has VS Code and JetBrains extensions with a more visual interface, though the CLI is the core tool.

2 – Requirements Before You Install
2.1-System Requirements
Based on Anthropic’s documentation at the time of writing, you’ll need:
- macOS, Ubuntu/Debian Linux, or Windows (via PowerShell, WSL or Git Bash)
- At least 4 GB of RAM
- An internet connection
- Ideally a Bash, Zsh or Fish shell
Requirements change, so confirm them in the official Claude Code documentation before you start.

2.2-Choosing Your Account Type
Claude Code needs an account. You have three main options.
2.3-Claude Pro or Max Subscription
You log in with your normal Claude account, and one plan covers the web app and Claude Code. Costs are predictable, which suits most beginners.
2.4-Claude Console (API Billing)
You pay per token (the small chunks of text the AI processes). It’s flexible, but costs can climb in long sessions.
2.5-AWS Bedrock, Google Vertex AI and Microsoft Foundry
These are for companies that already buy AI through a cloud provider. If you’re learning on your own, skip them.
| If you are… | Choose |
|---|---|
| A beginner or hobbyist | Pro or Max subscription |
| Building automated tools or scripts | Console (API) |
| Working at a company with a cloud contract | Bedrock, Vertex or Foundry |
The free Claude plan may not include Claude Code, so check what each plan includes on Anthropic’s pricing page before you pay.
2.6-Basic Terminal Skills
Once installed, you’ll run the Claude Code terminal session from inside your project folder, so you need only four commands:
| Command | What it does |
|---|---|
pwd | Shows which folder you’re in |
ls (Mac/Linux) or dir (Windows) | Lists files in the current folder |
cd folder-name | Moves into a folder |
mkdir folder-name | Creates a new folder |
3 – How to Install Claude Code CLI
Installing the Claude Code command line tool takes about two minutes. Anthropic recommends the native installer, which needs no Node.js. Pick one method below, not several.
3.1-Installing on macOS
3.1.1-Native Installer (Recommended)
Open Terminal and run:
curl -fsSL https://claude.ai/install.sh | bash
3.1.2-Homebrew Installation
If you already use Homebrew:
brew install --cask claude-code
3.2-Installing on Linux
The command is the same as on macOS:
curl -fsSL https://claude.ai/install.sh | bash
3.3-Alpine and Other musl-Based Systems
These need a few extra packages first:
apk add libgcc libstdc++ ripgrep
export USE_BUILTIN_RIPGREP=0
3.4-Installing on Windows
3.4.1-PowerShell Installer
Open PowerShell and run:
irm https://claude.ai/install.ps1 | iex
3.4.2-WSL and Git Bash Options
WSL (Windows Subsystem for Linux) gives you a Linux terminal inside Windows. It’s the better choice if your project already lives in a Linux-style environment or you follow Linux tutorials. Install with the Linux command above, and keep your project files inside the Linux filesystem rather than /mnt/c/, which is noticeably slower.
3.5-Installing With npm (Alternative)
If you already have Node.js and prefer npm:
npm install -g @anthropic-ai/claude-code
Don’t use sudo with npm. It creates file-permission problems that are annoying to undo. If you hit a permission error, switch to the native installer. If you installed through npm earlier, run claude install to migrate to the native version.
3.6-Checking Your Installation With claude doctor
claude doctor
This health check reports your version, how Claude Code was installed and any problems it finds. If it prints your version and no errors, you’re ready. Run it first whenever something behaves strangely.
3.7-Updating Claude Code CLI
Claude Code updates itself in the background and applies the update on your next launch. To update manually:
claude update

4 – Logging In to Claude Code CLI
Move into any folder and type:
claude
On first launch, Claude Code asks how you want to log in and opens your browser.
4.1-Login With a Claude Subscription
Choose the subscription option, sign in to your Claude account in the browser and approve access. Then return to the terminal.
4.2-Login With a Console (API) Account
Choose the Console option and sign in. Anthropic creates a dedicated “Claude Code” workspace automatically, so you can track usage there.
4.3-Switching Accounts and Logging Out
Inside a session, use /login to switch accounts and /logout to sign out.
If you use an API key, treat it like a password. Never commit it to git, and never show it in screenshots.

5 – Your First Project With Claude Code CLI
Let’s build something real. If you already have a small project, use it. If not, create a tiny one:
mkdir todo-app
cd todo-app
echo "<h1>My To-Do List</h1>" > index.html
That’s one HTML file with a heading. It’s enough for Claude to work with, and we’ll grow it into a simple to-do app.
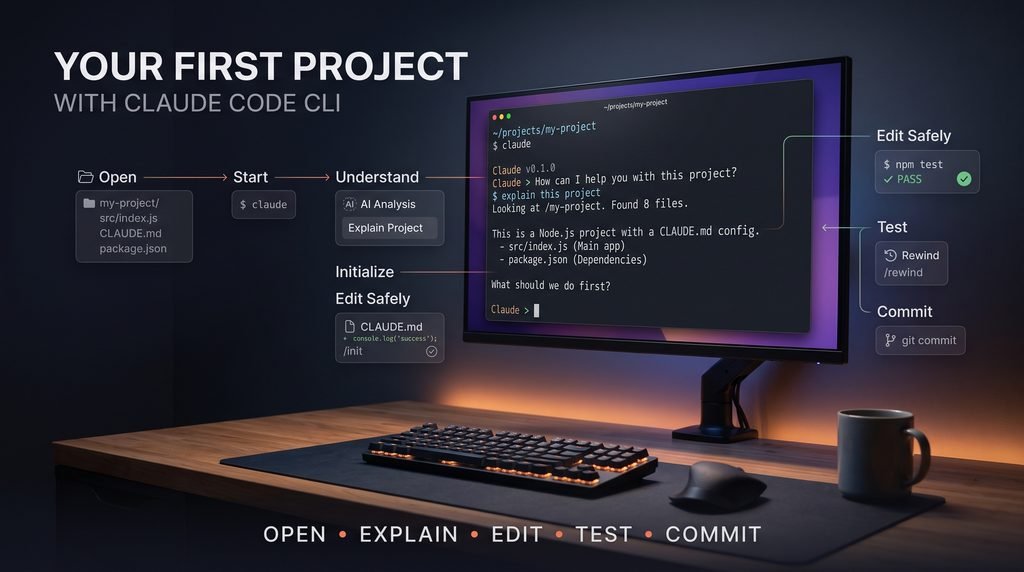
5.1-Step 1: Open Your Project Folder
Always start from inside your project folder. Claude treats it as its workspace, so launching from the wrong place means it can’t see your files.
cd todo-app
5.2-Step 2: Start Claude Code in Your Terminal
claude
You’ll see a prompt box where you type in plain English. Press Enter to send. To exit, press Ctrl+C twice or type /exit.
5.3-Step 3: Ask Claude to Explain Your Project
Before changing anything, make Claude read the project:
Explore this project and tell me what it contains.
On a real project, try: “Explore this codebase and summarize the architecture. Where does the main logic live?” This is a safe first move because reading files changes nothing, and it confirms Claude is looking at the right folder.
5.4-Step 4: Create a CLAUDE.md File With /init
/init
Claude scans your project and creates CLAUDE.md, a briefing note it reads at the start of every session: what the project is, how to run it and which conventions to follow. For our to-do app, a good one might say:
# To-Do App
- Plain HTML, CSS and vanilla JavaScript. No frameworks.
- Open index.html in the browser to test.
- Keep all JavaScript in script.js.
Keep it short. Some experienced teams aim for under 200 lines, because a bloated file wastes space Claude needs for your actual task. Include what Claude can’t guess from the code, such as your preferences and rules.
5.5-Step 5: Make Your First Change Safely
5.5.1-Use Plan Mode First
Press Shift+Tab to cycle permission modes until you see plan mode. Claude can read and think but can’t edit anything. Ask:
Plan how to turn this page into a simple to-do app where I can add and delete tasks.
Reading a plan takes a minute. Unwinding a half-built feature takes much longer, and this is the cheapest moment to say “no, keep it in one file.”
5.5.2-Approve or Reject Edits
Switch back to normal mode and tell Claude to go ahead. Whenever it wants to edit a file or run a command, it shows you what it plans to do and waits. You can approve once, approve for the session, or reject. Read the first few carefully before you start clicking through.
5.5.3-Work One Step at a Time
This habit matters most. Instead of “build the whole app,” try:
- “Add an input box and an Add button.”
- “Make clicking Add put the task in a list.”
- “Add a delete button next to each task.”
Small steps are easy to review, and when something breaks you know which step caused it.
5.6-Step 6: Run Tests and Commands
Start a message with ! to run a shell command directly, without going through Claude:
! ls
If you have tests, ! npm test is faster than asking Claude to run them. You can also ask Claude to run the tests itself and fix failures, in which case it reads the error output and tries again.
5.7-Step 7: Undo Mistakes With /rewind
When Claude takes a wrong turn, it’s tempting to reply “no, fix that.” But the wrong attempt stays in the conversation and can mislead its next try. Instead:
- Press
Esctwice (or type/rewind) to go back to an earlier point. - Use
/clearto wipe the conversation and start fresh.
Experienced users lean on these two constantly.
5.8-Step 8: Commit Your Work
If your project uses git, ask:
Look at my changes and write a commit message.
Claude checks the diff, drafts a message and asks for approval before committing. It won’t force-push or rewrite history unless you explicitly ask.
6 – Essential Claude Code CLI Commands and Shortcuts
These are the commands worth learning first:
| Command | What it does |
|---|---|
/init | Creates a CLAUDE.md for your project |
/help | Lists available commands |
/clear | Clears the conversation and starts fresh |
/compact | Summarizes the conversation to free up space |
/cost | Shows token usage and cost for the session |
/model | Switches the AI model |
/status | Shows current model, account and settings |
/rewind | Returns to an earlier checkpoint |
/resume | Reopens a previous session |
/permissions | Manages what Claude is allowed to do |
/mcp | Connects external tools and services |
Commands change quickly, so type /help to see what your version supports.
6.1-Handy Prefixes
@references a file:Review @index.html for accessibility problems. Claude loads it directly instead of hunting for it.!runs a shell command directly.
6.2-Keyboard Shortcuts
Shift+Tab: cycle permission modesEscEsc: rewindCtrl+C: cancel the current operation
6.3-Permissions and Safety for Beginners
6.3.1-How Permission Prompts Work
Claude can read files and search without asking. Anything that changes things, such as editing a file, running a shell command or fetching a web page, needs your approval.
6.3.2-Permission Modes
- Default: asks before each new type of action. Best while you’re learning.
- acceptEdits: auto-approves file edits but still asks about commands. Good once you trust a project.
- Plan: read-only. Claude can analyze and plan but can’t change anything.
There’s also a mode that skips every prompt. Avoid it until you’re experienced.
6.4-Protecting Sensitive Files
You can stop Claude reading secrets like .env files. Create .claude/settings.json in your project:
{
  "permissions": {
    "deny": [
      "Read(.env*)",
      "Read(secrets/**)"
    ]
  }
}
Review every edit before you accept it, even when it looks routine.
6.5-Beginner Tips for Better Results
6.5.1-Write Specific Prompts
| Vague | Specific |
|---|---|
| “Improve the login” | “Add email validation to the login form in src/components/LoginForm.tsx“ |
| “Fix the bug” | “Clicking Delete removes the wrong task. Find the cause before changing anything.” |
Say which file, what outcome you want and any constraints.
6.5.2-Reference Files With @
Pointing Claude at the exact file is faster than letting it search, and it avoids edits to the wrong one.
6.5.3-Manage Context With /compact and /clear
Every message and file read fills Claude’s working memory (its “context window”). When it gets crowded, quality drops. Use /clear between unrelated tasks and /compact during long ones.
6.5.4-Monitor Costs With /cost
Check it after big tasks, especially on API billing. Simple tasks don’t need the most powerful model, so switch with /model.
6.5.5-Common Beginner Mistakes
- Asking for the whole feature at once. Claude is more likely to wander off course.
- Ignoring Claude’s questions. If it asks something, it’s usually about to guess.
- Keeping one huge session open for days. Start fresh with
/clear, or use/resumeto return to a specific session.
6.6-Troubleshooting Common Problems
6.6.1-Command Not Found: claude
Your terminal can’t find the program. The native installer places it in ~/.local/bin, so make sure that folder is on your PATH. Close and reopen your terminal before trying again, then run claude doctor.
6.6.2-Permission Errors During npm Install
You probably used sudo or have a restricted global npm folder. Don’t force it. Use the native installer instead.
6.6.3-Login or Authentication Failures
Run /logout, then claude again to log in fresh. If you use an API key, check it’s valid and has billing set up.
6.6.4-Slow Performance or High Memory Use
Run /compact or restart between tasks. Add large folders like node_modules to .gitignore. On WSL, keep your project in the Linux filesystem, not under /mnt/c/.
6.7-What to Learn Next
Once the basics feel comfortable, go deeper in this order:
- CLAUDE.md best practices: make your project briefing note genuinely useful
- Slash commands: build your own shortcuts
- Hooks: automations that run every time, such as auto-formatting code
- Skills and subagents: reusable expertise and isolated helpers
- MCP: connect GitHub, databases and other tools
- Headless mode: use Claude Code CLI in scripts and CI/CD pipelines

7-Final Thoughts on Claude Code CLI
Claude Code CLI comes down to a simple routine: install it with one command, log in by typing claude, let it explore your project, create a CLAUDE.md with /init, and make changes one small step at a time. Plan mode and /rewind are your safety net whenever something goes wrong.
Don’t wait until you feel ready. Pick one small task today, such as explaining an old project, fixing a minor bug or adding a single feature. The best way to get comfortable with the Claude Code command line, and with any Claude AI coding assistant, is to use it on something real.
Ready for the next step? Read our Claude Code CLI Slash Commands Cheat Sheet to learn the 10 commands that save you the most time in the Claude Code terminal.Get a weekly AI tool tip in your inbox. Practical Claude Code CLI tutorials and AI tool guides, no spam. [Subscribe]
Frequently Asked Questions
1. What is Claude Code CLI?
Claude Code CLI is Anthropic’s AI coding assistant for the terminal. It reads your project, edits files and runs commands from plain-English requests
2. Is Claude Code CLI free?
No, it needs a paid Claude plan (Pro or Max) or a Console account billed by usage. Check Anthropic’s pricing page for current plans and limits.
3. How do I install Claude Code CLI?
On Mac or Linux, run curl -fsSL https://claude.ai/install.sh | bash. On Windows, run irm https://claude.ai/install.ps1 | iex in PowerShell, then type claude to log in.
4. Does Claude Code CLI work on Windows?
Yes, you can install it through PowerShell or run it inside WSL or Git Bash. Check the official docs for the latest Windows requirements.
5. Do I need coding experience to use Claude Code CLI?
No expert skills are needed, but basic familiarity helps you judge Claude’s suggestions. Reviewing each proposed edit is a great way to learn.
6. Is Claude Code CLI safe for my files?
Yes, it asks permission before editing files or running commands, and you can block sensitive files like .env. Use git so you can always roll back changes.
